Showing posts with label cooking. Show all posts

Sunday, September 6, 2015

stopping time, moving forward

tart cherry preserves - a taste of my childhood!

Ugh. Once again, where has the time gone? Well. I have been making things and taking photos all this long, hot, dry summer. I just haven't taken the next step of culling and editing photos and posting. I also feel like I've barely been keeping my head above water with the making.

Part of it's the heat; look at the grass in that top photo - little straw-twigs! This summer was a prolonged battle of attrition to try and keep the garden alive. It was more work and money than it was worth and eventually I threw up my hands and said, "I give up."

It was the right choice. And now that some more seasonable weather has returned (three good drenching storms in a 3-week period), I feel like I've had a little more time to gather myself and get things done. So I sat down yesterday morning and culled a bunch of photos to put together a couple of posts.

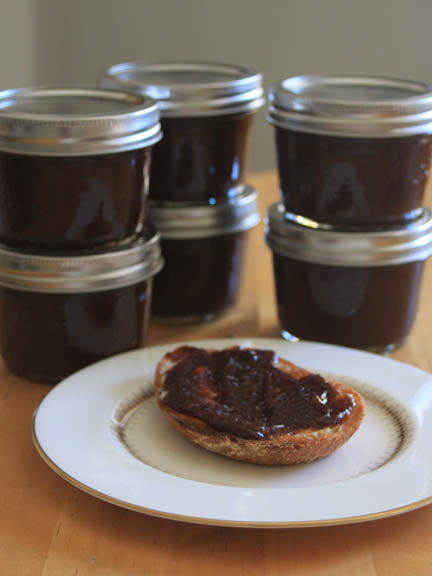
I found tart cherries at the U District Farmer's Market (thanks to a tip from my awesome neighbour) and made preserves - well, more of a low-sugar pie filling, really. I was only able to get 2 lbs of cherries, so these won't be shared, because after you remove the pits, the 2 lbs have pretty much become 1 lb and it's just not enough!! These are for turnovers or eating on English muffins this fall, and reminisces about the mature tart cherry tree I grew up with. (More on that in a moment.)


blackcurrant preserves!

At one point this summer, I walked into Ballard Market and there were flats of blackcurrants for just $10. I took one and went through the laborious process of picking all the bits of stems and flower ends off them - and then I made delightful blackcurrant jam. I have given lots of these away already, sharing the bounty, but there should be a few left at the holidays. I also baked the leftover preserves (when I ran out of jars to pack them into) into a completely heavenly vegan coffee cake (I had some stress this summer and my doctor ordered me off dairy - it took about three weeks for things to level out, and I started getting creative with the vegan baking). 

And now, back to that little note about the cherry tree of my childhood. I've bought one for my own garden: a Northstar. It's supposedly self-dwarfing, only growing 8-10' tall and wide, able to be netted and harvested without a giant ladder, resistant to cracking and brown rot, and when mature, producing plenty of fruit for a family of four. We only have two in our family, but I definitely eat more than my fair share of tart cherries - as a child and teen, these were the only fruits I would eat to the point of allergic reaction: when my grandparents visited and my grandpa brought jars of tart cherry sauce, I'd eat it all day ... until I broke out in hives on my wrists and inner forearms. I'd take a cold shower and put on calamine lotion before bed ... and in the morning I'd start all over again - no regrets!!

And where will we put this tart cherry tree? Well, we'll put it in our new garden that we're going to build ... in our new home. Cass and I have become homeowners - finally! - for the first time in our lives. I expect the tone of this blog will shift toward more decorating, gardening, and home repair/upgrade projects in the future, but for now we're living in boxes as we can't start moving until Tuesday.

And maybe the new home will be just the prod I need to get back into the swing of things here. Let's hope so - because Pacific Rain has been languishing this summer!!

Sunday, March 8, 2015

Stirrings


Hard to believe it's already time; the weather this year is off - I keep asking myself, is it El Nino or more serious climate change?  And while there's an anxiety gnawing at the back of my brain about summer, and drought, and wildfire season and all those poor people who live east of the mountains!, and the price of water, and planting vegetables that don't need too much water  ... at the same time, there's sun in the Pacific Northwest in February, in March. The temps are warm enough that I have been out harvesting nettles since early February ... and it's hard for a light-starved northern girl to remember that this sun and these mild temps are a bad thing, when it's February and sunny instead of February and bleak.

And so I've been out in the woods already, gathering nettles. Soon it'll be big leaf maple blossoms and the spring foraging season will really and truly feel like it's on.

In the meantime, if you need some color (and comfort!) in your life, try this recipe for beet bread from Twigg Studio!


As I'm something of an old hand at making bread, I used my own tried-and-true process for making bread with this one: first I roasted and peeled the beets, then ground them in the food processor to make a puree. Meanwhile, I proofed the yeast in the warm water with a pinch of sugar, then combined the yeast mixture, beet puree, oil, salt, and 1 cup of white flour in a bowl. I beat hard to make a creamy sponge, then added the remaining flour, 1/2 cup at a time, until a smooth dough had formed.

The next week, I made this same recipe again, using carrot puree (I boiled, then pureed the carrots) and chopped fresh dill; it was amazing. I love how flexible this recipe is; I'll definitely keep playing with it to make various vegetable breads. Give it a shot!

Sunday, February 22, 2015

A first


Sorry for my long absence here. I realized, last week, that since I started this blog while I was in grad school, this month marks the first time ever that I've held a regular, 9-to-5 job and had a blog. Hence, the silence. I definitely haven't worked out a balance yet with my job, with yoga, with housework, and with the blog - or any kind of creative making, really; I haven't made anything but food-things in a month. Part of that is because I've also got two freelance jobs on my plate right now - both historical fiction novels that I'm proofreading.

But there are at least a few food experiments going on around here, and this post marks the start of my efforts to try and get the blog back into the new balance of what feels, finally, like a fully adult life. (So happy about that.)

It's been such a mild winter around here this year that it'd be easy to forget that we had one at all. But winter is the season for citrus fruits, and I have a giant bowl of bitter Seville oranges sitting on my kitchen table as a reminder (I'm making marmalade this week - or maybe next weekend is more accurate). I also candied orange peels (below) a few weeks ago, and then used the leftover syrup to glacee kumquats (above) afterward. Recipes for the process can be found here (orange peel); I used the same process for the kumquats (and even the leftover syrup, as I said) as I did for the orange peels, and just let the sliced fruits cook in the already-reduced syrup for about 40-50 minutes, then placed them in a food dehydrator set to about 135 degrees F for an hour or two to help dry them. I loved these kumquats in my holiday baking this winter and everyone loved them so much that I wanted to have more on hand to use again this year.


Tuesday, September 9, 2014

italian renaissance


Growing up, Italian food was, like, the height of seductive cuisine in my world. In any TV show, people who were dating, people who were celebrating anniversaries, people who received promotions ... went to an Italian restaurant. Same with movies. As far as I knew, there was nothing more romantic or intimate or special than an Italian restaurant. Maybe French - but in films and on TV, the French restaurant was a place for experts; you had to speak the names with a French accent, and the waiters were always intimidatingly superior (pace francophiles, I'm talking about a child's impressions of pop culture 25 years ago here). People were obsessed with balsamic vinegar and arugula, every fancy cook with a cable cooking show would whip out that pasta machine and I'd feel a sense of awe and desire - heck, even as small child, one of my favorite toys was that play-doh expresser toy. Man, I loved that thing! 

These days, though, you don't see a lot of hype about Italian cooking. It's everywhere, it's comforting ... probably fewer people have the time for the intensive prep work of making things from scratch. The exciting new areas of cuisine lately seem to be other Mediterranean cultures - and points east. Freekeh. Quince. Preserved lemons.

I've been wondering if it's about time for Italian food to make a comeback as a trend.

Certainly, in my own kitchen, I've been making more pasta and pizza this summer than in many summers I can remember - and yes, entirely from scratch. We even have the fancy pasta machine now, but I don't seem to have the strength to change the settings on the thickness so I only ever use it if Cass is here to help me. Most of the time, I roll my pasta by hand, with a simple, solid wood, French-style tapered rolling pin that I bought at the hardware store for six or seven dollars (seriously, sometimes the simple, basic model is the best - I love the control the taper gives me, letting me pivot the pressure and work one bit of dough or crust at a time).

Tonight, it's fava bean agnolotti with a rich, creamy curry emulsion from The French Laundry cookbook. You can click the link to go to the recipe - it's on epicurious! The guys at my favorite produce stand down at the Public Market (aka Pike Place Market) had fava beans last week and I was terribly excited to see them. "Probably the last of the season for us," they told me, and admitted that the beans were a little past their prime - and should be cooked 1-2 minutes longer than normal. Since these are probably my last taste of favas until next spring, I wanted to find a nice way to showcase their flavor; and grinding them into a pasty filling also seemed a good way to deal with the potential issue of woodiness of overripe beans. I had fun folding the pasta into a new shape (for me), and breaking out my new fluted pastry wheel to make those pretty pinked edges (another one of those cheap, hard-working basic tools, we bought the fluted wheel at Mrs. Cook's for less than $8) that are so classic.

Sometimes, it's just so satisfying to stop what you're doing and spend a whole afternoon kneading eggs into flour, rolling out dough, and carefully forming perfect bites for a special dinner. And to boot, while I was waiting for the dough to rest, I squeezed in a good research session - the limited time was just the motivation I needed to overcome some procrastination/intimidation that's totally been holding me back on putting a grant proposal together. I guess even the quiet ritual of making pasta is a comforting influence, for me!

Thursday, July 10, 2014

week of jam, day three: thimblequest 2014!


Now for my absolute favorite wild berry: the thimble berry. Growing in patchy sunlight, with big fuzzy maple-like leaves, thimbleberries might be the most delicate of all the wild berries up here. They're mostly seeds and fuzz, not much juice, fall apart almost as soon as you pick them, and crush each other in whatever particular vessel they're being gathered. As a result, I can't wash these berries before I cook them (the secret's out! Are you grossed out?); if I did, I'd wash away half of the juice. So, we pick them carefully, removing all debris as we go, and then we pick through the berries again as we put them in the pan. But no water is involved.

This jam is also incredibly seedy. It's basically a seed-compote! I suppose if I really wanted to make a beautiful jelly, I could put the mix through a food mill or pass it through a sieve and make maybe one jar of perfectly smooth preserve, but I don't. It took a lot of picking to gather enough berries just to make the eight tiny 4-oz jars (every year, we call our thimbleberry picking "thimblequest," for the hours involved!) of thimbleberry jam I have tucked away in my pantry to last me through this year.

How does it taste, though? Like the brightest, tangiest raspberry you've ever had in your life. Delicious, and so worth that extra effort!

Wednesday, July 9, 2014

week of jam, day ... two?


whoops! Sorry about that; I got the photo taken before dark, but I didn't manage to stay awake long enough to post last night - in fact, it was still light out when I fell asleep (sometime around 8:30pm). Such a long and productive day yesterday - garden work, painting, etc.

Welp, we'll just have to extend Week of Jam by one day then, won't we? Today we have an apricot preserve, an easy way to put up and save some apricots that most definitely would have gone bad before we got around to eating them. This is another simple one: just wash apricots, pit them, and cut into quarters. I used about a pound and a half of fruit (maybe two pounds?). I placed the quarters into a pan with the zest of one lemon and about 1 teaspoon of lemon juice - apricots are so tart and zingy anyway, I didn't want this preserve to be too tart! I added the seeds from one vanilla bean and a couple Tablespoons of sugar. I cooked all of this together over medium heat until the apricots had mostly broken down (be careful! The apricots break down into a creamy mash that can stick and burn very easily - you need to stir this one frequently as you make it). I left some chunks because, well, why not?

Then I added another 3/8 cup of sugar, with about 1 1/2 Tablespoons of low-sugar pectin, whisking it in rapidly to incorporate into the hot mass - and cooked for a few more minutes before checking the set and canning/processing.

We like to combine apricot preserves with dijon mustard to make a tangy sauce/glaze that we brush over pork tenderloin before roasting the meat in the oven, a recipe picked up from one of Martha Stewart's "Everyday Food" mini-mags years ago. Any leftover glaze is used as a dipping sauce for the sliced tenderloin. Paired with some roasted asparagus, wilted spinach, or steamed green beans, it's a quick and easy weeknight dinner - in short, I know exactly how we'll be using these preserves!

Monday, July 7, 2014

week of jam, day one: strawberry


Yeah, I think I may have enough jam made (and to make) to do an entire week of jam posts. I might also be getting a little sick of jam, as a concept, already - ha! This was the first batch, the batch that kicked it off: our little strawberry patch is really taking off this year. It's nice to see our little garden investments start to pay off, and the back yard start to function like an old-fashioned homesteading garden, with gooseberries, currants, elderberries, strawberries, raspberries, and huckleberries - in addition to veggie beds, kitchen herbs, and the [floral] cutting garden! I already made another batch since this one, and have another bowl of strawberries in the fridge just waiting to be made into a couple more tiny jars.

I don't really have a recipe for this: I wash and halve the strawberries (if they're large), put 'em in the pot with some lemon zest, lemon juice, and the seeds of one half of a vanilla bean. I add a little bit of sugar (for this batch, which only comprised about 2 cups of fruit, less than 1/4 cup of sugar) and cook the fruit gently until it all breaks down. Once that happens, I add a bit more sugar with some pectin stirred into it, cook and check for gel set, and then process in my water bath. The proportions are pretty loose: I use less sugar than recipes call for, and a bit more pectin, and it all works out somehow. I think jam is kind of like pie crusts and biscuits and other things - eventually, you just kind of have a feel for them and you kind of lose track of precise measurements.

I like using lemon zest, lemon juice, and a bit of vanilla bean with fresh strawberry jam; there's something about this combination that really screams, "fair food" (as in, "state fair food" - slap it on a warm, fresh scone and my husband swears it is just like getting a scone from the Fisher Scones stand at the Evergreen State Fair). I'll tuck some of these jars away and they will be forgotten, just you wait and see. He never keeps track of what I put up, and doesn't bother pawing through the cupboard. Then, one morning in early autumn, on a week when we're tired and he's frustrated with something at work and wishing he could just stay home and sleep in, I'll get up early and make a batch of scones and pop them in the oven before I hop in the shower. I'll jump out and catch them just as they finish baking. He'll wonder what the timer is for and what smells so good - and I'll bring him a piping hot scone, slathered with sweet summery strawberry jam, and it'll make everything better.

Friday, May 30, 2014

I'm addicted to roasted strawberries!


I think I have a problem. No. I'm pretty sure I know I have a problem. I've eaten ... um ... I think I've eaten almost four pounds of strawberries in the past three days. All of them roasted.  Oh my gosh, you guys, these are so delicious!

I used this recipe from Dimity Jones of Three to One. It's very simple, just mix up 4 tablespoons of brown sugar and one 1 tablespoon of balsamic vinegar for every pound of strawberries you're going to roast. Wash strawberries, pat them dry, then cut off the green tops and toss them in the sugar mixture. Place them in a single layer on a non-stick baking sheet (I just laid down parchment, since my baking sheets don't have a nonstick coating), and place in a 250° Fahrenheit (120° Celsius) oven for 2 hours. And that's it - no stirring needed. Just walk away, enjoy the tantalizing smell that fills your house, and then eat these delicious berries!

I actually think Dimity Jones' recipe makes a bit more sugar/balsamic than you need. I used about 2/3 this much sugar/vinegar for my second batch. I got less syrup out of the deal, but I don't actually feel like I need to eat that much brown sugar - you know?


The strawberries hold their shape through the baking; when they come out, they're soft, and the seeds are sticking out a bit, but they aren't totally mushy.


And how do they taste? Like strawberry jam. Warm strawberry jam. Soooo delicious. You've got to try this.


Wednesday, February 12, 2014

marmalade season


And then there was more marmalade; this is actually only about half or two-thirds of the generous batch of Seville orange marmalade I made this year. I use Martha Stewart's recipe - it's a classic, even she says so! - except I add two whole vanilla beans to the mix while I cook it (I scrape the seeds in AND throw in the pods; just take the pods out before canning). The vanilla gives a nice sweetness to balance and tame the sharpness of the bitter oranges. I love this marmalade. Nothing comes close to the depth of flavor. Oh, don't get me wrong, the bergamot marmalade is heavenly perfume in a jar, but it's not what I think of when I think of classic orange marmalade. And now I have a big stock to greedily hoard (just kidding; I'll share) and enjoy all year, until next winter - and the next crop of oranges.

Monday, January 27, 2014

roast broccolini with preserved lemon and yogurt sauce


Today I want to share one of our favorite winter side dishes with you (though we often eat it as an entree), something we came up with after eating a similar dish at a favorite local restaurant. It's simple, requires few ingredients and little prep, and the results are flavorful and healthy - just the ticket for January! If you're interested in making your own preserved lemons, I have posted my recipe here. I think the homemade ones are a lot better than the kind you can get in the store, though - so if you try this dish and you like it, you might want to consider making your own preserved lemons. It doesn't take long to make them and they can be processed in a hot water bath and then put up for months (during which time, their flavor only further develops).

Alright, enough ado: on to the broccolini! Here's the recipe as we make it most nights, as a main dish for two people. You can easily halve, double or otherwise shift the proportions for this dish; it's very forgiving.

BROCCOLINI:
2 bunches baby broccoli/broccolini (regular broccoli can be substituted; just cut the broccoli into florets, and cut the stalk into long sticks)
1 Moroccan-style (also known as American-style) preserved lemon
olive oil
dried red pepper flakes
salt and pepper

YOGURT SAUCE
8 oz nonfat plain greek yogurt (we liked to use Fage for this)
2-3 Tbs. extra virgin olive oil (this is the time to use the really good stuff, if you have some on hand)
1-2 Tbs chopped fresh mint
salt and pepper

Preheat oven to 400° Fahrenheit. Place broccolini (or broccoli florets and sliced stalk) onto a heavy baking sheet or roasting pan. Chop preserved lemon. Drizzle broccolini with olive oil (1-2 Tbs is fine), sprinkle lemon bits over the broccolini, and top with a few pinches of dried red pepper flakes (to taste). Season with salt and pepper, using a light hand with the salt - remember, the preserved lemon is very salty! Toss broccolini until it is evenly coated with oil and seasonings.

Roast broccolini in oven until florets are starting to darken and develop a slight char, about 15-20 minutes.

Meanwhile, make yogurt sauce:

Stir together nonfat plain yogurt, chopped mint, and olive oil with salt and pepper to taste. A note on how much olive oil to add: make sure that the flavor of the olive oil comes through; this sauce should not simply taste like yogurt; you should be able to detect some of the fruity flavor of the oil. Add a bit of salt to balance the sour tang of the yogurt.

To serve:

When broccolini is done, pile on a platter and served with yogurt sauce on the side (or drizzle yogurt sauce over if you like).

Monday, January 20, 2014

bergamot marmalade to brighten your winter mornings

Somehow it never occurred to me that bergamot is a citrus fruit. Sure, bergamot flavour, in addition to being rather spicy and perfume-y, also has nice light citrus notes ... but I think I always assumed it was a bark or stem of a plant - not a fruit. And certainly not a bright yellow citrus fruit.

So when I first saw these "bergamot sour oranges" at my local whole foods market, I thought maybe that this was just a special name for a particular type of sour oranges (like "seville bitter oranges" or "lavender tangelos" - the latter taste nothing like lavendar, by the way). So I picked up three and brought them home and did some research. Lo and behold, I was surprised to learn that they're rather hard to come by in markets and that, yes, I could make a bergamot marmalade with them. In fact, I found this recipe from David Leibovitz.

I hurried back to the store and bought five more, so I'd have the eight fruits that Leibovitz calls for in his recipe. Of course, only after I looked at my receipt, which listed the weight of the bergamots I'd ordered, did I realize my bergamots must be a lot larger than the ones Leibovitz bought; though I'd bought the same number of fruits, they weighed more than twice as much!

I ended up making my own recipe. Leibovitz' decision to blanch his fruits first resulted in a brighter yellow-color, but I worried that without their acidic juices, the resulting marmalade wouldn't have a low enough ph. (it wouldn't be acidic enough) to be safe for canning. Also, some of Leibovitz's readers tried his recipe and reported back that their marmalade wouldn't gel properly, so I decided to use a different process to make my marmalade. It's a bit more time-consuming, but I find it results in a better set. I also used less sugar than Leibovitz; perhaps my fruits were sweeter, or perhaps I simply prefer a tangier marmalade. Alright, enough ado: on to the recipe!

Bergamot Marmalade

8 bergamots (approx 3.5 lbs)
4 c. sugar
6 c. water
1-2 Tbs. low/no-sugar pectin (just in case)

To begin, cut 8 bergamots into halves, and cut each half into quarters. Thinly slice each quarter across its width, removing any seeds that you encounter. For an even better gel-set, don't toss the seeds; instead, gather them all together in a bit of cheesecloth or a paper tea bag and save them.


Place all of the slices in a big heavy-bottomed pot and add 6 c. of water. If you have saved your seeds, add the seeds somewhere near the bottom of the pot. Over medium-high heat, bring the citrus-and-water to a boil. Cook for five minutes then cover and turn off the heat. Let stand until cool and transfer to the refrigerator. Refrigerate for at least 8 hours, or overnight.

This is the process Martha Stewart uses for making her marmalade, and I later learned (when researching apple butter) that there's a good reason for it. Cooking the citrus for five minutes in water begins to break them down, releasing the natural pectins which are found in the peels and the seeds (hence, if you save your seeds, your little seed-bag will help add pectins to the mix as it sits overnight). For the pectin to develop strands, it needs time, and the presence of an acid (which is naturally provided by the sour citrus fruit).  When I make apple butter, I cook the whole apples (skins, cores, seeds and all - I only remove the stems) with some lemon juice in water for five minutes, and then let it sit overnight in the fridge to develop these pectin strands. It generally works like a charm.

The next day, get your pan out of the fridge. Gradually reheat to a gentle boil. Remove the seed packet (if using) and discard, and add 4 c. of sugar. Cook, stirring frequently (to keep those sugars from sticking and burning) until the volume is somewhat reduced and the mixture becomes thick and sticky.

Meanwhile, put a small saucer in the freezer to chill. You can test your gel-set of your marmalade on the saucer: when you think the marmalade is ready, dribble a bit on the plate and let it sit for 30 seconds. Push on the blob with your finger - if a thick skin has formed on the top that wrinkles when you push the blob, it is ready. If not, clean your plate and return it to the freezer and keep cooking.

Now, if you have trouble and it absolutely won't set, mix 3-4 Tbs. of sugar with 1-2 Tbs. of low/no-sugar pectin together and add it to the mix. In order to keep the pectin from clumping into a hard pectin ball you must whisk quickly as you add the sugar/pectin mix, and keep whisking for another minute to incorporate it. In the end, I added 1 Tbs. to my pot to set it a bit more firmly (I think if I'd remembered to save my seeds and used them in the first boiling step, I wouldn't have needed this!).


And voila! Done! This recipe produced 3 quarts of marmalade for me. If you are canning, remember to warm your lids for 10 minutes in barely-simmering water to soften the rubber seals, and to get your canner hot, and to sterilize your jars and keep them warm as you cook your marmalade. You want to pack your jars with the marmalade while it's still hot, then clean the rims, add lids and screw on the bands, then process in a hot water bath for 10 minutes for pints  (if you are 0-1000 ft above sea level), 15 minutes for quarts. I like to pack this in small jars because then I can give it to more people.

The end result? Oh, it's heavenly. If you like bergamot, you'll love this. The taste is rather strongly of bergamot and delicately of lemon. I made up a batch of cream scones from the River Cottage Bread handbook (recipe on epicurious - why isn't their search function working lately?) and slathered on butter and marmalade. Just the ticket for winter mornings, when you want something a bit bright, a bit cheery, to remind you that spring is just around the corner!

Thursday, December 12, 2013

yuletide flavours: candied orange peel

 
M husband has a Satsuma addiction. Every December, I break out a tray or a bowl for our coffee table, and each week he fills it with stem-and-leaf satsumas (so pretty and cheery!) or even the piled contents of a 5-pound box. In addition to being cheery and delicious, they provide a key ingredient for my holiday baking: their peels.
 
I save the peels for a few days (I gradually fill a Ziploc bag that I keep in the crisper drawer in the fridge) then candy a big bunch of them at once. Candying orange peel isn't difficult; it's one of those tasks that takes more time and patience than skill. The first step is to simmer the peels in water (just enough that they have room to move around) for 2 hours, until the white pith becomes waterlogged. Then drain the peels and scrape away the pith using a spoon (I sometimes have a knife on hand, too, in case there are stubborn bits). Then cut the peels into strips (or tear into bits, whatever you prefer) and begin the candying process.
 
Combine equal parts water and sugar to make a simple syrup. Make sure you have enough simple syrup so that you can submerge all of your peels in it. Add the peels and simmer over medium-low heat (stirring occasionally to prevent any sticking or burning) for about 40 minutes. Strain the peels out of the syrup (you can save the orange-infused syrup for making cocktails!) and place on a rack to dry.
 
My peels normally remain a bit sticky if I don't roll them in sugar, so today I am trying a little alteration to my usual process. First, I simmered the peels for about an hour in the syrup, instead of 40 minutes - I kept an eye on the pan and waited until the syrup was starting to get really reduced before I drained the peels. I laid them out a cooling rack that I'd placed over a baking sheet lined with parchment paper, as you see below:
 

 - that's a lot of peel!

Finally, I put the whole pan in a low oven (about 200 degrees Fahrenheit) for another two hours. I've just turned the oven off and left the door open, to continue to dry them in the warmth. I'll report back if this results in a candied peel that is easier to work with for baking.

Now, I've just got to dig out all the lebkuchen and pfeffernusse recipes I've been saving. I don't think pfeffernusse needs orange peel, but lebkuchen does! I haven't had a lebkuchen in so long; it was my favorite as a child. In fact, one year, I named two stuffed bears I received for Christmas "Bel" and "Kuchen." =)

Friday, October 18, 2013

harvest 2013: quince jam


back when we made that weekend escape to Index, and I picked all that quince, I had no idea how much time I'd spend peeling, coring, and cooking it down. Okay, maybe I had some idea. But I was so excited about free quince that I accepted the challenge.

I didn't grow up eating quince, so it's still kind of a new flavor for me - and Cass, too. The last time I cooked quince, we tried it poached in a lemony white wine syrup. We hated it. Threw it out. Didn't help that I hadn't cooked it long enough.

This time, I tried something different; when talking about quince one day with some Arab friends, they burst into exclamations. For one thing, my friends didn't know what the English word for the fruit was (and since I've encountered relatively few people who even know what it is, I can understand why they hadn't yet had the opportunity to learn this word). My friends were also excited to share memories of quince slices in syrup, made with rosewater and cardamom. So, when I came across Izita's recipe for quince preserves on Tumeric and Saffron, her Persian cooking blog, I figured, fair enough, let's do this.

Since I wasn't sure of the variety of my quince, and therefor couldn't predict whether they'd hold up to cooking in syrup, I just cooked my quince wedges down in water and lemon juice until they were softened, then blended them into a thick puree in the food processor. I returned them to the pan and started adding sugar, rosewater, and cardamom to taste - a little bit at a time at first, but then I got more and more adventurous as my confidence grew.

The end result is a thick jam, almost a paste. The rosewater and cardamom give it just the right oomph, bringing out the beautiful pineapple-like floral quality of the quince itself. I gave Cass a spoonful right out of the pan and he raised his eyebrows in approval. Though it's still a new flavor to us both, this time we won't be throwing it out. I have a few ideas about how I'll use this. My grandmother used to make a pineapple cream cheese pie; it was a 30s-era recipe with a tangy pineapple base layered under a mix of cream cheese and milk and eggs. I used to request it every year in lieu of a birthday cake. I think the quince will lend itself well to something similar, paired with creamy or custardy layers. It might also be really good flavouring to add to a panna cotta, now that I think of it. I'd also like to give this quince curd brulee tart recipe from British Larder a go, and if I find I still have a lot left over, I might pour some into an oiled or parchment-lined pan and dry it in the oven for a day or two, and see if I can't produce something like membrillo at the end. Lots of options! I'll be sure to share the successes.

Tuesday, September 24, 2013

weekend escape


On Saturday we went to Index, to help out my in-laws who are replacing their deck, and to generally visit. This is how I always think of Index: the promised land. It's so incredibly beautiful up there - the crisp mountain air, the trees, these gorgeous peaks. We are so very lucky to have family there. I love getting to visit.

 
Eventually, we ran out of work. The deck supports had been braced with the six available 2x6s, and I'd put a second coat of stain on all the decking boards. I started putting a first coat on some other boards, but then they needed to sit for at least two hours before we could do the second coat.
 
So, what's a girl to do? Why, strip a branch of the neighbour's quince tree of unwanted fruit, of course! This look of pure joy brought to you by not having to pay $6-per-pound. And childhood nostalgia - we grew up with quince trees, though my parents never harvested the fruit. Still, I love the smell. I used to climb and play in our quince trees, even into my teenage years.

 
My in-laws encouraged me to go harvest whatever I wanted from the garden, as much as we could possibly take. "We're sick of it," they said. It's been a great year and they were tired of having to pick at this point. I get it, I really do. Even I was feeling this fatigue, earlier in the year, and I didn't have the gardens to tend that my in-laws do.

 
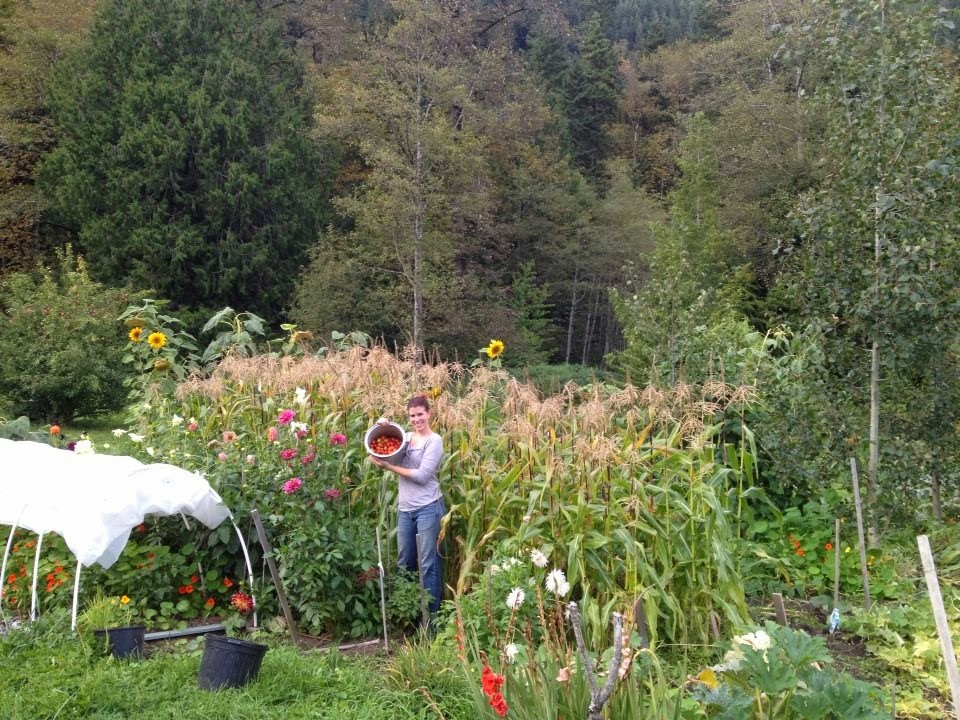
This is one of their gardens, tucked into a piece of property left vacant since a historic building collapsed during one of the big snowstorms in the winter of 2008. My in-laws live across the street and just till under the soil, add compost, and grow stuff there, since no one else is doing anything with it. It's a beautiful space: tons of dahlias, gladiolas, corn, big pumpkins, onions, potatoes, tomatoes, peppers, several kinds of squash, beans, sunflowers (grown for the birds, actually), nasturtiums tumbling everywhere .... and at the back is the sheer rock cliff that locals call the "town wall." (I find the understatement amusing.)
 
After harvesting we went for a nice family walk together, out through the woods and back along the river. We stopped on the bridge into town and watched the salmon spawning in the shallows. It was pretty amazing to see these noble creatures, who are so important to the culture of our region. They were so far from their ocean homes, and so close to death, returning to the place of their own births to mate and die. The river in Index is so crystal-clear that you can see right through to the stones at the bottom. Already hree silver bodies lay there, motionless. I wonder how many are there now.
 
 
Peggy told me to pick plenty of dahlias to bring home - for both myself and my neighbor, who is also a big dahlia fan. This is my half. Aren't they stunning?
 

I turned a bag of apples (some 10 or 15 lbs.) into a deep dish apple pie and four quarts of apple sauce (I processed three of them and put one quart in the fridge for immediate eating enjoyment).

That pan full of tomatoes that I'm holding in the picture above, combined with all the tomatoes I picked in my own garden in the past week, cooked down to two quarts of thin sauce. It'll need a fair amount of cooking to make a Bolognese sauce or a marinara for lasagna or pasta, so I'll probably actually keep these quarts and use them to make tomato soup this fall. I plan to sauté an onion and some cloves of garlic (chopped), then throw in some stock (probably chicken) and one of these quarts, and cook until it has reduced by half. I'll run the whole thing through the blender to make it smooth, and then add a pour of cream or milk and season with salt and pepper to taste. Maybe I'll even throw in some herbs - thyme, or rosemary. We love tomato soup and grilled cheese sandwiches in this house.

I'm kind of lazy and don't like to skin or juice tomatoes when making sauce, so I simply cut the larger tomatoes in halves (or quarters), threw them in a pot with a little water, and cooked them until everything was soft. Then I put them through the food processor and blended up the skins with the fruit. I put the puree back on the stove and reduced it by half, then packed it up. These tomatoes were acidic enough that when Cass took a little bit of the puree and added cream to it (to make himself a little bowl of "tomato soup" for dinner), the cream curdled. I probably didn't need to add citric acid to the jars, but I did, anyway (1/2 tsp per quart jar), just to be on the safe side. I processed for 15 minutes in a hot water bath after canning.

Friday, September 13, 2013

harvest 2013: backyard damsons


back in August, I spent a couple days in Portland visiting a friend and washing her apartment's floors. Ha, I know that sounds strange. But she'd been a bit down and needed a boost. I came down to cook and clean for her for a few days; I think life gets much more manageable when you come home from work to find your apartment shining, flowers on the table, and dinner ready - you know what I mean?

On the first day there, I swept the alley behind her apartment clear so I could make trips to the recycling/garbage/compost as I prepared dinner. There was a damson plum tree back there, growing over the fence from a neighbour's yard and little plums had fallen all over the place.

This was an opportunity!

Before I headed home, I took a plastic bag from the kitchen and filled it with damsons, a good 8 quarts of them once I'd halved and pitted them and thrown them into a saucepan.

I cooked these with a little water and some lemon juice and lemon zest until they'd begun to break down. I put them through a food mill to make a mash and then continued to cook them with some spices (cloves, I think, and cardamom pods and who knows what else), adding just a little sugar and a splash of brandy near the end...

 
at which point I had reduced eight quarts to just over six cups of rich, yummy plum butter.
 
I regret not saving a couple to make plum dumplings for Cass. On the other hand, I found a recipe for trdlniky on the web. Stay tuned; I might actually jury-rig a trdlo and make myself some plum trdlnik this autumn. (You can take the girl out of Prague, but apparently you can't stop her from contemplating Czech pastry.)

Wednesday, September 4, 2013

harvest 2013: ground cherry jam


Last year - or was it two years ago? - was the first time I'd ever heard of a ground cherry. What's a ground cherry, you ask? Well, it looks kind of like a small tomatillo plant as it grows; the cherry-tomato-sized fruits develop in green papery husks and are ready to harvest when they fall to the ground. They will last longer if you leave them in their husks, so don't peel off the husk until you're ready to eat! They range in colour from pale yellow to deeper orange and taste rather like pineapple. I've read that one shouldn't eat too many of them raw, as this can cause indigestion, but I haven't tested this and don't really know that it's true (some folks claim that they grew up eating them raw, by the handful, and never had a problem; I wonder if all those upset stomachs may have simply been caused by ingesting a large amount of a new food?) Anyhow, most sites recommend making pies or jellies out of them - which is, obviously, the route I chose.

Sadly, I didn't get more than this one little jar because I planted my ground cherry in a pot and grew it on my deck. It's hotter there, but I think it was a little stunted - and I never did plant a bunch of other ground cherries, as I'd planned this year. Oh well! Next year! (The gardener's eternal refrain, no?)

But this little jar is full of lemony pineapple goodness, though maybe a little sweet for my taste (Cass will love it). I think I'll open it right at the start of December or maybe even January, and bake some nice warm scones one morning. We can split them open and slather them, steaming hot, with butter and a bit of this jam and won't that be a sunshiney pick-me-up during the dark grey months of the year?

Tuesday, September 3, 2013

harvest 2013: pickled huckleberries


awhile back, we took a weekend day and escaped to the mountains with two of our friends, to go berry picking at some of our favorite secret spots in woods near my in-laws' house. Though we found tons of red huckleberries, blue hucks were pretty hard to find - and the ones we did find were on shrubs that otherwise looked like red huckleberry bushes (not the denser, shorter evergreen huckleberry, with its thicker, more leathery leaves).

Still, I got a few jars of pickled huckleberries out of our haul, and made alpine blackberry jam as well (post forthcoming). I used both of Christina's recipes from the now-defunct Nettletown blog (sad; I always wanted to eat there, but couldn't get the time during my doctoral studies), though I omitted the shallot (and the chiles, too, I think) from the first recipe, as I love the bright zingy flavor of pickled hucks just on their own and wanted to preserve it for winter dinners, to enjoy with goat cheese. I processed mine in a water bath for 10 minutes so I could put them up in the pantry and save for winter.

Above are red huckleberries with juniper and fennel. Below are red huckleberries (left) and blue huckleberries (right) with star anise and balsamic. In the middle? Some pickled asparagus I threw together, using Molly's recipe on about.com.

Monday, September 2, 2013

a birthday cake

 
this was all that remained, the next day, of Cassidy's birthday cake - and thank goodness, because this thing was dense and rich.  I'm long overdue for posting recipes for this "Mounds Bar" cake (chocolate and coconut), but it was so good that I wanted to share everything, along with my notes. This is a chocolate cake (made with a bit of coconut oil for subtle coconut flavor), with a thick coconut filling (modeled on a recipe for homemade mounds bars) and a coconut mousseline buttercream frosting.

First, let's talk about the coconut cream, as this is what I used to achieve a good coconut flavor in my frosting while preventing it from becoming way too sweet. I bought Let's Do Organic brand coconut cream in the 7 oz tetrapack. This coconut cream is WAY thicker than what you might find in a can. It is, essentially, ground up coconut meat mixed with a bit of coconut oil to make a paste. When you first open the tetrapack, the coconut meat will probably have separated from the oil. I took advantage of this fact and scooped out all of the oil into a little bowl. I then put the ground coconut meat in another bowl. I added little bits of coconut oil at a time and worked the coconut meat into a thick paste - like a really thick peanut butter - but reserving as much of the oil as I could (I combined this leftover coconut oil with some other coconut oil I had on hand, and used it in lieu of the vegetable oil in the cake layers). Save the thick, unsweetened coconut paste for filling and frosting.

CAKE LAYERS:
 
First, for the cake layers, used the Double Chocolate Layer Cake recipe at Epicurious. This is our standard chocolate cake recipe, with only a few changes/substitutions for the Mounds Cake: 1.) I always use freshly-brewed espresso instead of coffee, and 2.) this time I used 3/4 c. coconut oil instead of vegetable oil and 3.) I didn't have buttermilk on hand, so I mixed together a bit of cream and a bit of skim milk, added some lemon juice and let it stand for about 5 minutes to thicken. I used this thick curdled cream in lieu of the buttermilk.
 
Ignore the recipe for the ganache that accompanies the cake! Bake the layers the day before serving, allow to cool, and then wrap tightly in plastic wrap. This seals in moisture so the cake is fudgy and tender.
 
COCONUT FILLING:
For the filling: I used this recipe for homemade Mounds bars as my model. But instead of using canned sweetened condensed milk, I made my own and added coconut cream to imbue it with coconut flavor.
 
To begin, I used this recipe to make homemade confiture de lait (or sweetened condensed milk), but I halved the recipe and used cream instead of milk.

So: I combined 3/4 c. cream, 1/3 c. sugar, and 1/2 tsp vanilla extract in a heavy-bottomed saucepan. I heated it to a simmer over low heat (patience is key here, so it doesn't burn!) and cooked it, whisking often to prevent sticking/burning, for 2 or 2 1/2 hours. When the mixture had reduced by half, I stirred in1 1/2 Tbl. of the coconut cream paste (instead of butter). Then I put this in the fridge to chill. Put the rest of the coconut cream paste in a container and refrigerate it as well; you will pull it out again when you make the frosting.

Once the confiture had chilled, I spooned it into the bowl of my food processor. I added approximately an equal amount of unsweetened flaked dried coconut and pulsed them together to make a smooth paste. At first it was a little too sticky and thin, so I added more coconut (a little bit at a time) until I had made something which resembled the filling of a Mounds candy bar.


above: the confiture de lait, mixing up the filling.
 
I centered one of my cake layers on my cake stand, and began spreading the filling over the top of it. Or rather, I kind of patted it out. The filling was so thick that it was like a sticky dough, so I patted and pinched it between my fingers to make a disc, then laid that disc on top of the cake and gently poked and pushed at the edge to spread it around. Because the filling was very sticky, I had to be careful not to pull up bits of cake from the top of the cake layer as I worked it around. Once I had the filling pressed evenly around the layer, I placed my second cake layer on top of the filling. I pressed down gently, to kind of seal the two layers together with the filling. Then I put three wooden skewers into the cakes to hold it together for frosting, and put the cake into the fridge to chill it. Chilling the cake made the filling firm up and become very solid, which helped hold the whole thing together. Chilling a cake also helps prevent it from causing frosting to melt when you apply the first "crumb coat" to the cake.

 
above: the disc of coconut-cream filling has been patted and prodded out to the edges of the bottom layer; the top layer is pressed onto the filling, and skewers hold the cake layers in place.
 

 MOUSSELINE BUTTERCREAM FROSTING:

While the cake chills, it's time to make mousseline (or Italian Buttercream) frosting. I used this recipe from The Kitchn as my model, with a few tweaks to give it a rich coconut flavor. Why bother making a fussy Italian buttercream, you might ask? Well, when making a birthday cake for the middle of summer, I find that a standard American buttercream has a tendency to melt and run. This cooked meringue base promised to hold together better in heat, and wouldn't be as sweet as a fondant.

To make my buttercream, I separated six eggs. I saved the yolks for another use and let the whites stand out at room temp for 30-60 minutes before beginning to make my frosting. At this point, I also got the remaining coconut cream out of the fridge, to start warming up and softening it.

Using a hand-held mixer, I beat the whites with a pinch of salt in the bowl of my stand mixer until soft peaks were formed. Then I transferred the bowl back to my stand mixer.

Meanwhile, on the stove, I had combined 1 cup of sugar and 1/2 cup of water with 1/4 tsp of Cream of Tartar in a saucepan. I heated this mixture over medium heat until it reached the soft ball stage (between 235 and 240 degrees Fahrenheit). I actually got out a glass of  ice water to check the accuracy of my candy thermometer - and boy was I ever glad that I did. My thermometer was more than 10 degrees off!

Once the sugar syrup had actually reached soft ball stage, I took the sauce pan over to my stand mixer. I set the mixer running on high, and slowly poured in the syrup in a thin stream into the egg whites. After pouring in all of the syrup, I left the mixer running. According to The Kitchn's recipe, you must let the mixer keep mixing until the sides of the bowl feel "room temp" when you touch them (so it's a good idea to use a metal bowl for this, or something which conducts heat well).

While the mixer was beating the meringue up to fluffy whiteness, I prepped my 2 cups of butter. Only I wasn't going to use two cups of butter: can you guess my secret? Yes, the remaining coconut cream. Measure out the coconut cream (which will probably still be hard; that's okay). I think I had about a half cup left. Combine with enough butter to make two cups. Soften by microwaving for about 5 seconds at a time. As the butter softens, use a fork to mash it into the coconut cream and mix the two together.

Once the meringue has reached room temp, reduce the blender's speed to medium and start adding the butter/coconut cream, one tablespoon at a time. After all the butter/coconut is incorporated, add 1 Tbl vanilla extract (or you could use coconut here; I just didn't have any on hand). Chill the buttercream until firm before applying to cake.

above: pouring hot sugar syrup into egg whites; mashing coconut cream together with butter to make a smooth, creamy paste

FROSTING:

Once the buttercream has chilled to a spreadable consistency, it's time to put your first coat of frosting on the cake. This is called a "crumb coat," and the benefit of a crumb coat is that it kind of seals the cake together, so that you won't drag crumbs or bits of cake through your frosting when you do the final coat. The crumb coat should be as thin as you can manage. After frosting the cake with the crumb coat, chill the cake again for an hour to make sure the frosting is firm.

above: chilled cake layers and frosting. Do you notice the granular quality of my frosting? It was a little too cold to use. I let it warm up a bit more and whipped it up with my handheld blender and it became smooth again. At right: the crumb coat is on! Leave the wooden skewers in the cake until you are applying the second/final coat of frosting (and even then, frost the sides of the cake first). They will help provide stability, so nothing slides or slips while you are trying to frost the cake.
 
After applying the final coat of frosting, chill the cake again until you are ready to serve. Then, enjoy!


Monday, July 8, 2013

homegrown: blackcap-raspberry-and-black-pansy jam

we started gathering our first real harvest of blackcap raspberries this year. There'll be loads more next year - while only three of our original six canes survived the first year (and the plants don't start to fruit until their second year), those three flourished last year and spread a lot of runners. As a result we have a LOT of young raspberry plants this year - dozens. I'll have a lot of pruning to do next spring!

I combined the few cups of berries I've pulled off the plants in the last few days with some black pansies (and some not-black pansies, as you can see!) to make two little jars of jam. While the blackcaps cooked with just a couple tablespoons of water (to prevent them from sticking to the pan) over low heat on the stove, I ground the pansies with a half cup of sugar in the food processor to make a grainy paste. I stirred low-sugar Realfruit pectin into the paste and then added the sugar-pectin-flower paste to the berries as soon as they'd broken down a bit. Stir stir stir, bring to a boil, and voila! Jam!

I canned and processed the jars for 10 minutes, though five would probably have been sufficient. The result is a beautiful, deep black-purple jam studded with tiny seeds. The pansies add a subtle minty-violet flavor that plays well with the floral quality of the blackcaps.

Saturday, July 6, 2013

foraged and found 2013: thimblequest!


Finally, I vowed, this was the year: the year I would make thimbleberry jam. I had graduated, had no real claims on my time, and could commit to a day of meticulously culling bushes in the woods for miles, all to source enough fruit for a few jars of jam. My husband said I was crazy; he said it couldn't be done. He protested that thimbleberries were worthless, too little fruit and too much work to pick. Even my father-in-law's enthusiasm waned as the hours dragged on. Heck, even mine did. What a lot of work! But ... we pulled it off! (And then, exhausted and suffering a bit from low blood sugar, I ate WAAAAY too much delicious Mexican food and had to go to sleep for a few hours. Yum!)

What's a thimbleberry, you might ask? It's a native plant in the Pacific Northwest. Though it grows in both sun and shade, it prefers sunnier spots. It's a 4-5-foot-high shrub with broad fuzzy leaves (they look like maple leaves), no thorns, and a few small clusters of very delicate red berries. They look a bit like raspberries, but far more delicate. The flavor, however, is very intense - and also like raspberry.

They're absolutely my favorite wild berry,  but it's hard to find a lot of them that are ripe at one time, and because they are so delicate, many tear and do not come away intact as you pick. In our four-and-a-half hour picking session yesterday we scored 2 cups of red huckleberries  (the season started early this year, because of our warm weather!), 2 cups of wild mountain blackberries (precious treasure!) and about five cups of thimbleberries.

Since we knew we couldn't rinse them without losing half of the berries - they're so delicate that, even packed in small Tupperware containers, they soon crush each other under their own weight. So we carefully cleaned them as we picked, brushing away any debris and sticking to clean, good specimens. I picked through them a bit before dumping them in the pan and making this very simple jam: a little water (just to keep the berries from sticking!), a little sugar, and a bit of low-sugar pectin. That's it!

And the verdict? After tasting it, my husband said the flavor was like raspberries and strawberries combined, together with something ineffable, something wild in the mix. It got a big enthusiastic thumbs-up. Heck, I think he might even be game for more berry picking this summer! The thimbleberry  bushes we picked up in the mountains looked like they were just ripening their first fruits - so if you're interested in giving this a whirl, you should be able to find ripe thimbles (if you know where to look!) for another week or two.